Creating the Label
Step 1
The DVD Label was created successfully using Adobe Illustrator.I start off by creating the label with the measurements in the assignment criteria to create a Template. After creating a new document and naming it DVD Label, I set the document size to 120mm both the width and height.

Step 2: Creating the Template
I selected the eclipse tool from my tools pallet and set it to 118 millimetres. (See Screenshot Below).
I placed the circle in the center, to be accurate I used the transform tool and turned on the center reference point in the center. I then enter 60mm on my X and Y coordinates to place the circle on the center accurately.
I did the same procedure again creating another eclipse of 117mm and transformed it to the center. (See Screenshot below).

I did the same procedure again creating another eclipse of 25mm and transformed it to the center. (See Screenshot below).

I did the same procedure again creating another eclipse of 17mm and transformed it to the center. (See Screenshot below).

The above screenshot is my Template for my DVD Label, after I centred all the eclipse accurately I locked the Template layer so it stays and avoid mistakes.
At this stage my Template is done and my next step is to create a vector image to use it as my main image and background for my label.
Step 3: Creating the Vector Image
I made my vector image by tracing an image and expanding it to convert the image to an editable object. I then applied different shades and transparencies using the Threshold option. The result is a beautiful and realistic looking traced stroke that is 100% vector.First up, I imported an image to Illustrator to start up and make it a vector image using the method above. See image below.

Then I selected the Object menu and Live Trace, under the Live Trace menu I choose the Tracing Options. In
the Tracing Options window, I choose “One Colour Logo” for the Preset, and then
bumped the Threshold up to 220. I then clicked “Trace” and saw the result as
a solid black shape of my image (See Screenshot Below).

Once I had my image traced,I selected clicked the Object menu and chose the Expand option to
convert the trace to an editable object, and reduce the colour to 20% black. (See Screenshot Below).

With the shape selected I went back to Object -> Hide ->Selection to hide the shape from view. (See Screenshot Below).

I repeated
the above steps 3 times, pasting the image on a new layer each time. For each
image, I reduced the threshold setting in the Tracing Options window down to
(160, 80, and 50) to reveal more detail with each trace. Once it is traced and
expanded, I increased the black colour by 20% (so… 40%, 60%, and 80%).
Also, note
that when I pasted the image it lands in the exact place the previous images
did. Therefore, the resulting traced shapes are directly on top of one another. As shown on the screenshot below.

As seen above the layers are traced and directly on top of one another. It is visible by the colour of each layer and fades slightly in the next layer and so on. (See Screenshot Below).

Now that I have all of my traced images on separate
layers, I selected the Object -> Show All to reveal all of
the shapes. The image below is the final piece.

Step 4: Creating Bloody Drips and Importing the Title
I started by drawing a spherical shape on an area in my label, I used the eclipse tool, hold down SHIFT on my keyboard and drew a little circle. (See Screenshot Below).
Secondly, I selected all and removed the stroke on the object/circle and applied a colour to it. I choose a bloody colour on my colour pallet. Next up, I selected the Direct Selection tool and click-dragged my top anchor point of my object as you can see on the screenshot above (3 anchor points highlighted). Thirdly, after selecting my anchor point I hold SHIFT on my keyboard to avoid the object to expand and whilst holding the shift key I dragged the object to a preferred height I wanted my drips to be. (See Screenshot Below).

After dragging the object to a preferred height, I selected the Add Anchor Point tool under the Pen tool from my tools pallet and selected the part I want to shrink. I did this by clicking a point on my object both left and right with my Pen tool and selecting my Direct Selection tool to highlight these points and I moved/shrink it in. I did this on both left and right of the object. (See Screenshots Below).


After editing the anchor points and shrinking it, I wanted to apply a 3D effect to it to look like an actual blood dripping look. To start, I selected my Mesh tool from my tools pallet and selected where I wanted the 3D highlight on my object. After selecting the area I wanted I opened the CMYK pallet under the colour pallet and reduce the darkness of the "C" bar, basically I increased the lightness of the specific area of the object to have a 3D effect on it. (See Screenshot Below).


The above screenshot shows the multiple drips with different sizes, length and width by editing the anchor points on each one but with the same effect. This made it look unique.
Title Importation
Next up, I needed to export my DVD Case Title on my label. I saved it after cropping it off my case and I imported it by going to File->Place->Choose File "Title" option and the Title is imported safely. (See Screenshots Below).

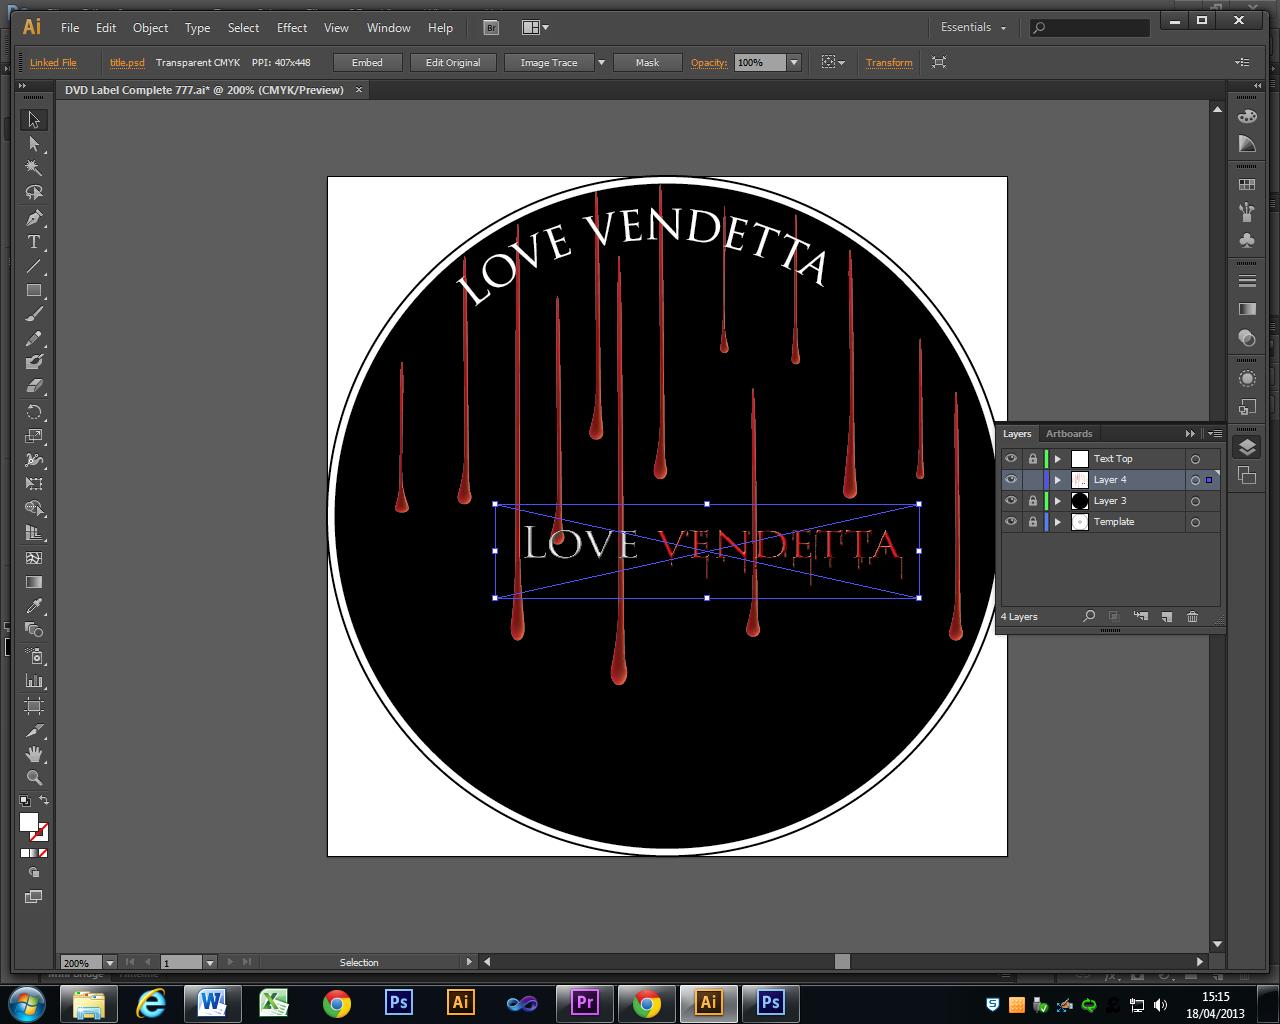
After going through the importation, my title is imported as you can see the screenshot above. I placed it at the bottom-center of the label.
Step 5: Importing the Vector Image onto the Label
After creating my vector, I need to import it to my label to fit and represent as both the cover and background of the DVD Label. I opened the Label and selected all the layers, copied and pasted it to the label. After pasting, I placed it to the center of the label and dragged out the corners (as you can see it highlighted) to make the backgrounds grey so the vector will stand out uniquely. (See Screenshots Below).


After importing and placing the vector into position, I moved the Blood Dripping layer underneath the vector image layer so the blood drips will be on top of the vector as seen above. Then as you can see the Label have some tiny text around it, it was quit simple. I typed some movie copyright notes and pasted it using the Text tool and the Type On A Path tool, I then rotated it to align and fit like a semi-circle just like the original DVD label.
Step 6: Importing Logos
Next up, I needed some logos to paste it on the Label so it can look realistic. I edited some logos on Photoshop like a DVD logo, Warner.Bros logo, Dolby Digital Logo, DTS logo, Parental Advisory logo and an Age Restriction (18) logo. I created 6 layers and imported them one by one from Photoshop after saving it. (See Screenshot Below).
Pretty much, my label was looking great and I was satisfied with it.
Final Look

Final Look above, as I finished this document.
No comments:
Post a Comment